Thursday, December 15, 2011

Anzac Biscuits

The other day, Chanin asked me to make Anzac biscuits (cookies for those of you in the US). Well, I made them today and thought I'd put it here because they are the quintessential Australian biscuit.

Here's the Wiki page for them, so you'll know the history of these great tasting biscuits: http://en.wikipedia.org/wiki/Anzac_biscuit

Ingredients:

125g (4oz or 1 stick) butter
1 tbsp golden syrup (If you can't get golden syrup, use light Karo syrup)
2 tbsp boiling water
1 1/2 tsp bicarbonate soda (baking soda)
1 cup oats
3/4 cup desiccated coconut (macaroon or unsweetened coconut in the US)
1 cup plain flour
1 cup sugar

Pre-heat your oven to 300F (150C)

In a bowl, mix oats, coconut, flour and sugar.

Melt butter and golden syrup over a low heat. Add boiling water mixed with bicarbonate soda.

Pour the wet ingredients into the dry ingredients and mix well.


Drop teaspoonfuls of the mixture on to a greased or baking paper lined baking tray, leaving enough room for spreading and bake in the oven for 20 minutes.


Once done, cool on the tray for a couple of minutes, then move to a wire rack and allow to cool completely.


Store them in an airtight container.

These biscuits are great with coffee!

Hope everyone has a great Christmas!!

Enjoy.

Matt

Saturday, December 3, 2011

You want some of my pie!?

With winter well on the way here in NE Ohio I thought it was time to bust out a winter recipe. So last night we had Chicken and Leek Pie.

I can't really remember where I got this recipe from, but it's one that I know by heart.

Here's the skinny.

Ingredients:
1kg (2lbs) boneless skinless chicken thighs
3 leek
2 cloves garlic, crushed
2 can cream of chicken soup
olive oil
1 egg, well beaten for egg wash
shortcrust pastry
flaky pastry

Cut the chicken into bite sized chunks


Thinly slice the leeks, including most of the green tops. Then rinse well in a colander to get all the dirt out.


In a large frying pan over medium/high heat, cook the chicken in a splash of olive oil until brown and set aside. Cook the chicken in batches, so the pan doesn't get overcrowded.


Next, saute the leeks and garlic in another splash of olice oil. You want the leeks soft, but not browned.


After the leeks are done, drain off any moisture from the chicken and add to the fry pan, then stir to combine. Add the 2 cans of cream of chicken soup and mix, on a low heat, until thoroughly combined. Then set aside until it cools to room temperature.


Next is the pastry. I use a short crust pastry for the bottom and the pastry from the sausage rolls for the top. Both of these can be made in the food processor and it's a lot cheaper than buying puff pastry.

Shortcrust Pastry

2 cups plain flour
4oz (125g) frozen butter, diced
¼ tsp salt
2 eggs
1 tbsp cold water
squeeze of lemon juice

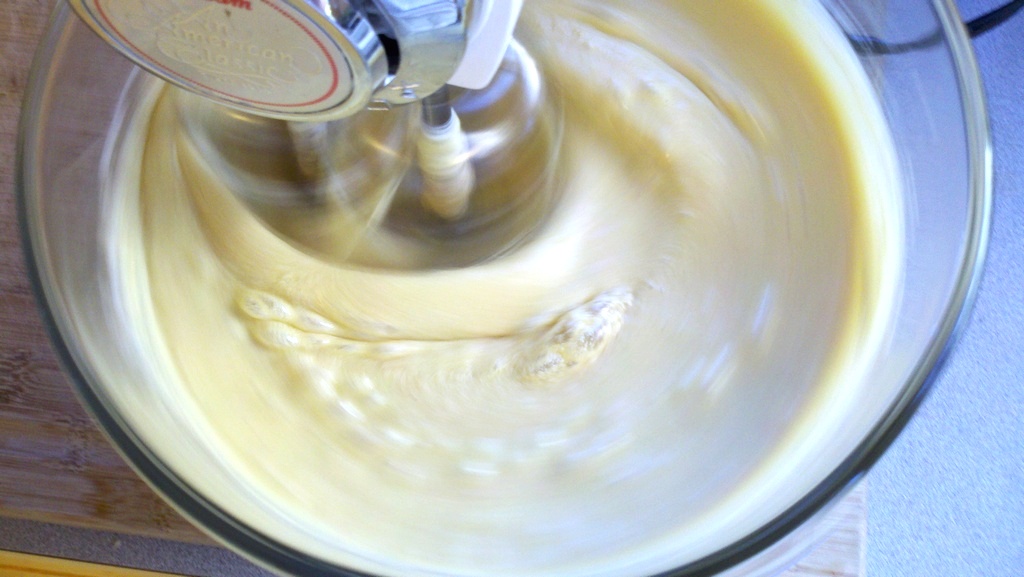
Place flour, butter and salt in the food processor. Process, using pulse, until butter is cut into the flour and the mixture looks like coarse breadcrumbs.

Mix eggs, water and lemon juice.

With food processor running, pour liquid quickly through feed tube. Do use it all unless it’s necessary – stop pouring as soon as a ball of dough forms around the blade.

Wrap dough in alfoil and chill for 1 hour before using.


Flaky Pastry

2 cups all purpose flour (plain flour) plus extra for dusting
Pinch of salt
½ tsp mustard powder
½ cup butter, diced
6 tbsp ice water

Sift the flour into the bowl of a food processor with the salt and mustard powder.

Add the butter and pulse until the mixture resembles coarse breadcrumbs.

With the processor running at the slowest speed, add water, a bit at a time, until a dough ball forms. Do not add too much or the dough will be sticky. You want the dough soft.

Form into a ball, wrap in foil and chill in the refrigerator for 20 minutes.


Both of the pastry recipes will make enough for 2 pies, I don't know how well the pastry freezes, so what you do with it is up to you.

When you are ready, pre-heat your oven to 400F (200C).

Roll out the shortcrust pastry making sure you dust your surface with flour to prevent it from sticking.

Lay the pastry into your pie dish and trim off the excess. I used a glass pie dish, but I would recommend a metal one so that the bottom of the crust browns better.


Prick the pie crust with a fork all over the surface.

Add the pie filling to the pie making sure there are no gaps.


Roll out the flaky pastry, the same as the shortcrust pastry, coat the edges of the shortcrust pastry with some egg wash and lay the flaky pastry over the top.


Trim the edges, press to seal, cut some steam vents in the top and brush with the egg wash.


Bung it in the oven for about 25 minutes or until the top is nicely browned.


I must admit, I didn't use egg wash around the edge of the pie and the crust lifted.

Let the pie rest for about 5 minutes and then dig in!


The hardest part of this is making the filling before hand, other than that, it's probably the easiest savoury pie you'll ever make.

As always,

Enjoy.

Matt

Saturday, November 5, 2011

Bring in the Pud!

G'day! I haven't put anything on for a while and I appologise for that. I just haven't cooked anything interesting lately. But, with winter on it's way, I'll be busy doing stews, casseroles and other good stuff.

Today I finished making our Christmas Pudding. For the unfortunate among you that haven't had a Christmas Pudding before, here's and explanation as to what it is: Christmas pudding 

My Grandpa (Dad's Dad) was the pudding maker in our family, so, even in the stinking hot Summer of an Australian Christmas, we'd have pudding and custard after our Christmas lunch. Dad never made the pudding, but he did give me Grandpa's recipe and when he died, I took up the pudding making and continued to do it ever since. Even when I moved to the US, I introduced it to Chanin's family...some like it, others don't, but that just means there more for me!

On to the recipe.


Ingredients:

½ lb butter (226g or in the US, 2 sticks)
10 eggs
6 cups fresh breadcrumbs (I buy a loaf of white bread and run it through the food processor)
1 tsp nutmeg
¾ lb brown sugar (340g)
12 g mixed spice (0.5 oz) (mixed spice is available on-line but you can make your own by combining 1 tbsp each of ground nutmeg, allspice and cinnamon)
1 cup plain flour
1 lb sultanas (golden raisins) (450g)
1 lb currants (450g)
1 lb raisins (450g)
½ lb mixed peel (226g or 1 pack of lemon peel and 1 pack of orange peel)
6 tbsp brandy

Method:

Combine all the fruit in a bowl, add the brandy and mix well. Cover with Glad wrap and let it sit overnight.


The next day....
Cream butter and sugar. Add well beaten eggs.


Combine fruit, mixed spice, nutmeg, egg sugar mix and mix.


Add breadcrumbs and mix well.


Add flour a little at a time and mix.

  
Have an extra large pot (pasta pot is best because of the insert) of water boiling vigorously. Wet 2 squares of muslin/calico (32 in x 32 in) in the water and lay flat one atop the other, after wringing out.

Sprinkle a little flour on the top cloth and place pudding mixture in the centre.

 
Bring the corners of the first cloth together, then the corners of the second cloth. Form the mixture in the cloth into a rough ball shape and tie the opening with cooking twine as close to the pudding as possible and as tight as you can, leaving some excess twine to hang the pudding. (There should be excess cloth that you can hold onto.)

 
Place pudding into pot and boil for 5 hours, keeping an eye on the water level and topping up when required. If you don’t have a pasta pot then you will need to suspend the pudding in the water, so it doesn’t touch the bottom of the pot. You can do this by winding the string around a wooden spoon and suspending it that way.

  
Once cooked, hang in a cool dry place for 2 or 3 weeks. (The longer it hangs, the better the flavour – I hang mine for 5 to 8 weeks.)


On day of use, again have water boiling vigorously and cook for 1 hour. When done, unwrap and place on a platter for serving. Having the water boiling is very important! If you put into cold water and bring it to the boil, you will ruin your pudding. This will keep for a long time in the fridge after you have it on Christmas Day. I'm usually still having a bit in late January. All you have to do is wrap it in foil and stick it in the fridge.


Onto the custard. This is my Mum's recipe, which I don't believe varies too much from any other recipe.


500mls milk (17oz.)
1 egg
2 tbsp sugar
2 tbsp cornflour (cornstarch)
1 tsp vanilla

Put 400mls (13.5oz.) milk into a non-stick pot, add egg and whisk into milk. Add sugar and heat the milk mixture until hot, but not boiling.

Put cornflour into a small dish, add remaining milk and mix to combine.

Add to milk mixture and stir continuously until it comes to the boil.

DO NOT over-boil. As soon as the first bubbles appear, remove from the heat. Make sure that the custard does actually boil otherwise it will have a real uncooked taste from the cornflour.

Add the vanilla and stir to combine.

Place lid on saucepan and put aside to cool. (The lid prevents a think skin from forming on the custard.)

To prevent the custard from becoming lumpy, don’t have the heat up too high once the mixture starts to thicken. The time it goes lumpy is just as the mixture turns from thin to about the consistency of whipping cream.

If you want your custard “pouring” consistency, then add extra milk…but be careful as it can go runny.
It's really that easy to make the custard from scratch instead of using custard powder.
So there you go, I know what I'm having for Christmas this year, do you?
I'll update a couple of the photo's after Christmas to show a slice of the pudding with the custard on there.

Enjoy!

Matt

Thursday, October 6, 2011

Sunday Lunch Special - Roast Pork Dinner

Tonight I went back to my early childhood with dinner. We used to go to our Grandpa and Nanna's every so often for Sunday lunch and almost without fail, because of our convict background I suspect, we'd have a roast dinner. Either lamb or pork with crackling.

These days pork isn't what it used to be 25 or 30 years ago. Because of the way society has changed pork has been bred to be leaner than it used to be, but you can still enjoy a throwback to, at least my, childhood.

For this recipe your best bet is to get a boned shoulder. If you can't get that, you can do what I did and get a piece of pork belly and either stuff and roll it or roll it around a small pork loin.


If you use a pork belly or boned shoulder, you're better off scoring it before you roll it. Use a very sharp knife or like me, a razor blade. Just make sure you wash the razor blade first!!

You only want to get through the skin, DON'T cut through the meat at all. Score it about 1cm (1/2") apart.


Once you've scored your meat, you're going to have to shape it. As I mentioned, I rolled mine around a loin.


Next, you'll have to tie it. This "technique" can be used for any meat dish that you need to tie. Here is a very good explanation from Bon Appetit: How to tie meat Here are a couple of photo's so you get the idea.


Now that you've scored and rolled the roast, you need to salt it. All you have to do is get salt (I used kosher salt because I can't get cooking salt here.) and rub it all over the skin. Don't use too much or all you'll end up tasting is salt.


While you're buggering around with your pork, you need to pre-heat your oven to 500F (260C). Now just put your roast on a rack in the roasting pan and put it in the oven for 20 - 30 minutes, until the skin is blistering and crackling.

After 20 - 30 minutes, turn the oven down to 350F (180C) for the rest of the cooking time. Now, you want to roast your meat for 30 minutes for every 500g (1lb) plus an extra 30 minutes. So it's important to weigh or have weighed your roast so you know how long to cook it for.

We also had roast veggies with ours, potato, butternut, sweet potato and carrots. Just make sure you cut the veggies about the same size. I just put about a tablespoon or so of oil in another roasting pan and pre-heated that in the oven while I prepared the veggies. Put the pan on the shelf above the roast 1 hour before the end of the cooking time. When there's 30 minutes to go, take out the veggies, turn them over and put them back in the oven.

Hopefully, when the timer goes off, your meat will look something like this.


Of course you'll want to have gravy with your roast, so why not make it from scratch. It will taste so much better than anything that comes out of a packet and is very simple to make.

Put your roast on a plate and return it to the oven to rest. Make sure you've turned the oven off!!!!

Pour off all but 1-2 tablespoons of the meat drippings from the pan and put that on the stove over a medium-ish heat. Sprinkle 2 tablespoons of AP flour (Plain flour) and mix that thoroughly with the drippings, making sure you scrape the bottom of the roasting pan. (That's where some of the best flavours are!)


Let that cook off for a couple of minutes, then add, a bit at a time, some mild beef or vegetable stock. I say mild beef stock, because you don't want the gravy to overpower the meat and veggies, just compliment it. If you're having boiled veggies, you can use the vegetable water in the gravy.

As you add the liquid, make sure you stir it constantly so you don't end up with lumps. I usually add some stock and stir until it gets thick, add some more stock and stir, etc, etc. You'll need 2 cups of whatever liquid you are using. Once you've used all the liquid, turn your burner down and let the gravy simmer for 5-10 minutes, stirring every now and again to break up and "skin" that forms on top.


When your gravy is done, all you need to do is carve your meat and plate up.


So there you go. A fairly typical Australian/New Zealand/English Sunday lunch or a great dinner when the weather turns cold.

Hope you enjoy.

Matt

Saturday, October 1, 2011

Fish and Chips

There's nothing better than a rainy cold night, watching Doctor Who and eating fish and chips. Unfortunately, what passes for fish and chips around here, is not real good. So the solution is to make your own.

I did a lot of searching to find recipes that replicate what you can get from fish and chip shops back in Australia.


So, with that said, here's what I had.

Chips

200g Russet potatoes per person
Deep fryer with peanut oil


Method


1. Peel your potatoes, then for thick-cut chips, cut into ½ inch slices then slice these into ½ inch wide chips. For shoestring style, cut into ¼ inch slices, then slice these ¼ inch thick.


2. Wash the chips in water then drain on kitchen paper.


3. Place the chips in a pan of cold water, bring to the boil and gently simmer for a couple minutes for shoestring and about 10 minutes for thick cut. Drain in a colander and leave to cool.


4. Pre-heat oil to 250°F (120C), or as low as you can go, in a deep fryer. Blanch your chips two or three handfuls at a time until they are soft but not coloured, about 5 minutes. Remove from the oil and drain. You can store the chips in this state in the fridge for up to a couple of days.


5. To serve the chips, re-fry them in hot oil 375°F (190C) until they are crisp, season lightly and serve immediately.


Of course, you HAVE to have chips with chicken salt.

Next, the fish. The batter I used for this is pretty much exactly the same as you'd get from any take-a-way shop. (I'm a bit of a traditionalist.) I've tried beer batter and using soda water to "lighten" it up, but if I wanted to eat tempura, then I'd make tempura. 


The fish doesn't come out greasy at all and I'll tell you why...when you deep fry it in a batter, the batter is what gets fried by the oil and acts like a barrier so the fish actually steams inside the batter.


Also, if you don't have self-raising flour, you can "make" it by adding 2 teaspoons of baking powder to 1 cup of plain (all purpose) flour.

4 x fish fillets (any white flesh fish) completely thawed if frozen!!
Plain flour
Salt and Pepper

For the batter:
4 oz (110 g) self-raising flour
½ teaspoon salt
5 fl oz (150 ml) water, plus 1 scant tablespoon

Method
Preheat the deep fryer to 375°F (
190°C). Or 1/3 fill a deep saucepan with vegetable oil and place over a medium heat.
Sift the flour and salt into a mixing bowl, then gradually add the water, whisking continuously until the batter is smooth and free from lumps. Or, if you want to use a blender, add liquid, then dry ingredients and blend until smooth.
The batter is the right consistency when, if a finger is drawn across the back of a spoon coated in the batter, a sharp decisive trail is left behind.
Check the batter seasoning and adjust to taste with salt and pepper.


To deep fry:
Liberally dust each fillet of fish in the prepared flour.
Lift each fillet from the flour and lower into the batter, ensuring each fillet is generously coated.
Gently lower the fish into the oil (gently to avoid any splash!).
Leave the fish to cook for 3-5 minutes depending on size.
As the fish cooks the batter will darken in colour and when each fish is nearly cooked it will rise to float on the oil's surface.
Remove the fish from the oil with the fryer basket or a slotted spoon.
Place the fish on a wire rack to drain.
Sprinkle a little salt across each fillet to soak up any excess oil.


Where you went wrong:
No rise in the batter when cooked: The cooking oil wasn't hot enough
The fish cooks slowly and remains soggy: The cooking oil was not hot enough
The batter falls off when cooked: The fish was not liberally coated in flour / or the fish was pre frozen and not defrosted properly before cooking / the batter was too thin.
Too thin: Add more flour and whisk through.
Too thick: Add a little water.
Too bland: Add salt, pepper or lemon juice.


As you can see from the pictures above, I also made some crab sticks and had a bash at Dim Sims. The dim sims didn't come out too good but here is the recipe for them anyway. BTW, dim sims were invented in Australia by a Chinese immigrant...here's a wiki on the subject: http://en.wikipedia.org/wiki/Dim_sim

 
1 packet Wanton wrappers
1 lb Pork mince
1 finely chopped onion
1/4 finely chopped Chinese cabbage
1 tsp minced garlic
1 tsp minced ginger
2 tbsp fresh coriander
1 tbsp soy sauce

Directions:
Combine pork mince with onion, cabbage, garlic, coriander, ginger and soy sauce in a bowl, then place spoonfuls of mixture in wanton wrappers and wrap up.
Place in pre-heated deep fryer until golden brown or steam until wrapper is almost translucent.
Note that steaming takes a little bit longer to cook the meat than deep frying.
I think that mine were way too big, so the inside didn't cook before the outside was too cooked. I have made them successfully once before, so I might have to give it another go.
Hope you have a go at this...it really does taste good and pretty authentic.

Enjoy.

Matt