Thursday, July 4, 2013

Pickle me grandmother - Sweet Mustard Pickles

I know, I know, it's been months since my last post...these 70 hour weeks don't leave too much time to do much, especially cooking. But, I'm going to try and do at least one post a month from now on.

If you grew up in the late 70's or early 80's in Australia, you'll recognise the first part of the title.

My grandmother used to make these occasionally and I used to have Sweet Mustard Pickles in the fridge when I lived in Sydney for sandwiches. Unfortunately, here in the US, there's only two ways to get them. Either buy them from one of the online stores or make your own. I have made it before here and I got the bug to make them again. I actually submitted them to All Recipes and they posted it: http://allrecipes.com/recipe/sweet-mustard-pickles/

Chanin actually put some on a hot dog the other night and said it was great, it tastes like a combination of relish and mustard, so there's another thing you can use them on.

Sweet Mustard Pickles

 
Ingredients:

3.5 liters water
1 cup salt
1 large cauliflower cut into small pieces
3kg onions, diced
2 cucumbers, diced large
1.5 liters cider vinegar
1 cup plain flour
4 cups sugar
2 tablespoons mustard powder
1 tablespoon curry powder
1 tablespoon ground turmeric
 
Method:

Make a brine with the water and salt in a large pot. Place vegetables in the brine and allow to soak overnight. 


Bring the mixture to a boil, reduce heat and simmer until vegetables are just tender. Strain off water.Make sure you don't let the veggies get too soft, like I did. The recipe will still work, but the veggies should still have a bit of bite to them.

Mix the remaining ingredients together until smooth and add to the vegetables. Bring to the boil, reduce heat to a simmer and cook until mixture has thickened. Stir occasionally to prevent mixture sticking. 


Pour into warm sterilised jars and seal immediately.


And there you have it. Be prepared for the kitchen to smell for a bit, but it's a small price to pay!

Enjoy

Matt

Wednesday, February 6, 2013

More delish fish!

It's been a while, hasn't it? I've been busy working two jobs and haven't had a chance to do much cooking, much to my, and Chanin's, disappointment.

But I hope to change that starting today.

I got this recipe from Aldi's website. They have a few good looking recipes there and I thought I'd give one a go. It turned out pretty well, but I think their cooking time for the beans is a bit too long, ours turned out overdone a bit.

Mustard Crusted Salmon with Green Beans

Ingredients:

1 cup Seasoned Croutons
1/3 cup Parmesan Cheese
1 tbsp Italian Seasoning
2 tbsp Extra Virgin Olive Oil, divided
16 ounces Extra Fine Green Beans
Salt, to taste
Ground Black Pepper, to taste
16 ounces Salmon, thawed
3 tbsp Dijon Mustard
1 lemon, sliced into wedges

Method:

Preheat oven to 400F.

Place croutons in a food processor and pulse to form large, coarse crumbs. 


Add parmesan cheese, Italian seasoning and 1 tablespoon olive oil, and pulse gently to combine. Mixture should be coarse and crunchy.


Place salmon fillets on a greased baking sheet and season with salt and pepper to taste. Spread Dijon mustard evenly covering each piece of salmon. Top mustard with breadcrumb mixture. Roast salmon fillets for 10-15 minutes or until cooked through and the topping is crunchy and golden brown. 


Place frozen green beans on a baking sheet and toss with 1 tablespoon olive oil and salt and pepper, to taste. Roast in the oven until hot and beginning to caramelize, about 10 minutes. (The recipe called for 20 minutes, I cut it down to 15 and they were still a bit over cooked, that's why I'm suggesting 10 minutes.)


Serve the salmon with the green beans and lemon wedges.


We had this with a side of stuffed pepper casserole that Chanin had made.

This is is another pretty fast meal to get together. It takes about 5 minutes to prepare and put everything together, so it makes an excellent weekday dinner.

Enjoy!

Matt

Sunday, November 4, 2012

Homemade take away holy grail - Chiko Rolls

What the, is a Chiko Roll I hear you non-Aussies ask. At it's simplest explanation it's an Australian version of an egg roll. Here's the wiki about it and it's history: http://en.wikipedia.org/wiki/Chiko_Roll 

Chiko rolls are one of the hardest things to find a recipe for so hard in fact, that I pieced this together from a couple of different recipes and the ingredients listed on the manufacturers website. Some recipes call for curry powder or Chinese 5 spice powder which shows you how "authentic" they are. Some even call for rice, which is not even remotely associated with them. And none of them call for barley, which is an ingredient. The hardest part of making these would be the pastry...it is an egg and flour pastry that I have not and honestly could not replicate. From what I can find out, the machine they use to make the pastry into the tubes is proprietary, so you just can't buy them. Most recipes call for spring roll pastry, which is way too thin. I used egg roll pastry which is thicker and works so much better, in fact, next time, I'm going to experiment with layering 2 sheets on top of each other, but for this version, I just used one.

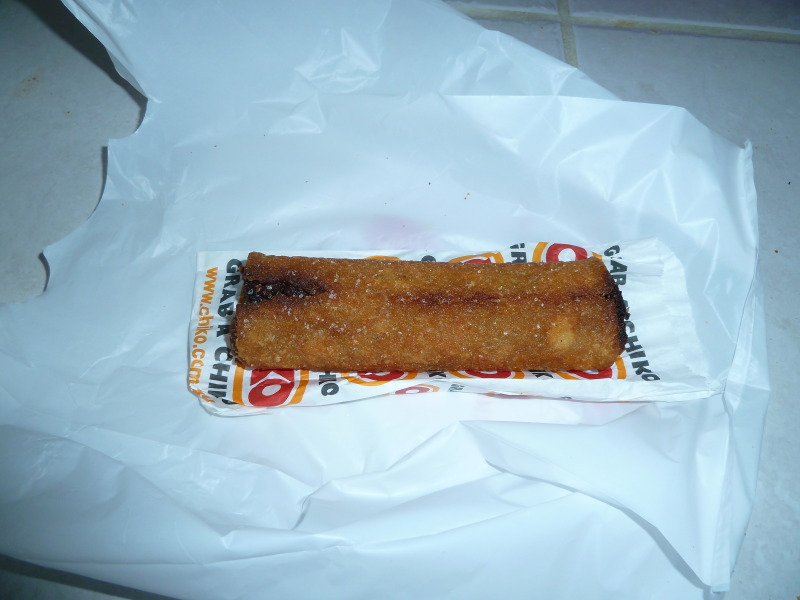
Here is a picture of an original Chiko roll and the insides, courtesy of a mate in South Australia  named Tanya. So, thank you Tanya for ducking down the road, getting a Chiko roll and dissecting it for me!


So on to the recipe. I honestly believe that this is as close as you can get to the real thing.   


Chiko Rolls

2 tsp butter
1.5 cups green cabbage, finely shredded
1 celery stick, finely sliced
1 cup cooked barley
green beans
1 carrot, chopped
1 onion, cut in half and finely sliced
200g ground beef or cooked ground lamb
1 chicken stock cube
1 tbsp plain flour
2 tsp sugar
Salt
8 sheets egg roll pastry
1 egg, lightly beaten
Vegetable oil for frying

Remove the egg roll pastry from the fridge to defrost.

Cook the beef or lamb until browned and crumbly. I used lamb because I had it in the freezer and the original recipe used lamb or mutton, but now they are made with beef.


Melt the butter on a medium heat in a frying pan. Add the onion, cabbage, celery, green beans and carrot to the frying pan and cook until soft.


Add the beef and the chicken stock cube and cook until heated through. Add the flour, mix in and cook for a further 5 minutes.


Lay out 1 pastry sheet at a time, keeping the rest under a moist clean tea towel.

Lay 3 tablespoons of mixture at the bottom centre of the sheet and fold the sides in to the middle and roll.


Brush the end with egg to adhere to the pastry. Cover rolls with a moist tea towel. Repeat until all the mixture is used.

Blanch in 300F oil for 5 minutes, drain and allow to cool.


Fry in 350F oil until golden.


And here is the end result...awesomeness! 


This was really one of the hardest recipes I have done so far...not in the making, but just in getting the recipe. Now that I've done it, it won't be years before I have another Chiko Roll.

Enjoy.

Matt

Sunday, October 14, 2012

Asian Odessey...Chicken Chow Mein

I think I moved to the wrong country...I love Asia. It doesn't matter which country, I'd love to see them all and possibly live there. The living there won't happen but I can still enjoy the food at home.

Some of my friends on Mates Up Over were talking about Chicken Chow Mein and the way their mothers made it, some said they used a soup mix. So, I went to my cook books and have a look to see what I could find. Turns out not only is it the most well known Chinese dish in the West, it's one of the easiest to make too...and no soup mix. :-)

The easiest way to make anything, especially Asian dishes, is to do all the preparation first, so that you can get on with the business of cooking. This is particularly true with stir-fry's because they require the highest heat and fast cooking.

We are fortunate to have a number of very good Asian stores around here, including a large supermarket about 30 minutes away. Most ingredients you can get from the local supermarket but some you really do have to get from an Asian store and unfortunately, sometimes there are no substitutes. 

I added dried shiitake mushrooms to mine because I saw them yesterday at the Asian store and couldn't resist them. Plus, they are a very good source of protein.

Chicken Chow Mein

Ingredients:

350g/12oz Chinese egg noodles
225g/8oz skinless boneless chicken breast
3 tbsp soy sauce
1 tbsp chinese cooking wine or dry sherry
1 tbsp sesame oil
4 tbsp vegetable or peanut oil
2 cloves garlic, minced
50g/2oz snow peas (mange-touts), topped and tailed
115g/4oz bean sprouts
handful of dried shiitake mushrooms
4 spring onions, finely chopped
salt and fresh ground black pepper

Method:

Put the mushrooms in a heatproof bowl, cover with boiling water for 20 minutes. Drain and cut off and discard the stems. Cut into strips and set aside.


Cook the noodles in a saucepan of boiling water (about 3 minutes) until tender. Drain, rinse under cold water and drain well. Set aside.


Slice the chicken into fine shreds about 5cm/2" in length. (I used chicken tenderloins because I had them in the freezer and if you slice them on an angle, you get the right length) Place in a bowl and add 2 tsp of the soy sauce, the cooking wine or dry sherry and sesame oil.


Heat half the oil in a wok or large saucepan or high heat. When it starts smoking, add the chicken and stir-fry for 2 minutes and set aside.


Wipe the wok clean and heat the rest of the oil. Stir in the garlic, snow peas, bean sprouts and mushrooms, stir-fry for a minute or so and add the noodles.


Continue to stir-fry until the noodles are heated through. Add the remaining soy sauce to taste and season with salt and fresh ground black pepper. Add the chicken and any juices to the noodle mixture, add the chopped spring onions and give it a final mix.


There you have it. It's actually a quick meal and should take, including preparation, about 30 minutes to make.

Enjoy!

Matt


Saturday, September 29, 2012

You'll relish my tomato relish.

I normally have a sandwich or two on Monday's and I've been rotating the condiments around a bit but I've gotten bored with them lately and missed having tomato relish. I used to make it back in Australia and Mum said at one stage that she thought I should enter it in the Royal Easter Show for judging...I never did and actually regret it now. (BTW, for the non-Australians here is a link to the Easter Show: http://www.eastershow.com.au/info/index.aspx )

I've only made this once since moving to the US but usually have all the good intentions of making it...this time I actually extracted my digit (pulled my finger out) and made it.

It's really good on sandwiches as well as putting on sausages and steak.

I got the recipe from my trusty Margaret Fulton cook book. I usually make a double batch because it it time consuming and I usually go through it pretty quick.

Ingredients:

1.5kg (3lbs) very ripe tomatoes
500g (1lb) onions
2 cups sugar (you could go with 1 1/2 cups)
2 1/2 cups malt vinegar
1 tbsp plain flour
1 tbsp curry powder
1 tbsp mustard powder
1 tbsp salt
pinch of cayenne pepper

Method:

Cut a cross in the bottoms of the tomatoes and blanch them in a pot of boiling water for 30-60 seconds. Remove from the water and peel the tomato, but be careful as the tomato will be very hot...asbestos fingers come in handy!. (The hot water will make the skin practically slide off.)


Chop the tomatoes and put them into a colander sitting in a bowl. You want to collect and set aside 3/4 cup of the juice. (You may have to help the juice out by pushing down on them.) 


Chop the onions, how fine or coarse is up to you, but leave some of them a bit coarse for texture.


Put the tomatoes and onions in a saucepan with the malt vinegar and sugar and simmer, uncovered, until the mixture is thick. This will take a couple of hours at least.


When the mixture is thick, put the reserved tomato juice, flour, curry powder, mustard powder, salt and cayenne pepper in a small bowl and whisk to combine.


Pour the mixture into the tomatoes and onions, turn up the heat a little and stir until the mixture comes to a boil, then simmer it for 5 minutes.


Bottle the mixture in clean jars and seal them when they have cooled to room temperature. You DO NOT NEED to follow the American way of sealing the jars in a water bath or however they do it. This stuff will not go off due to the acid in the tomatoes and vinegar. As I mentioned, I've been making this for quite a few years and have yet to get sick or have any "go off" on me.


This is a bit time consuming but really is worth the effort.

Enjoy!

Matt